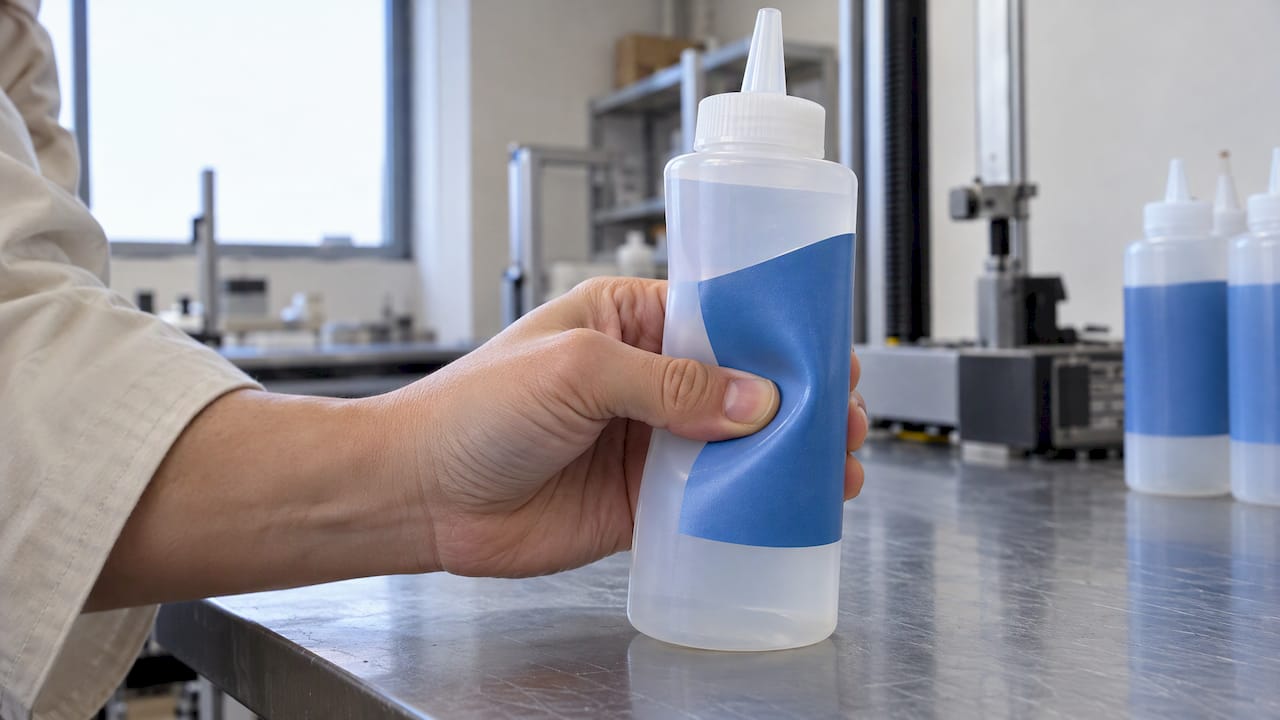
A label for a squeeze bottle has to survive thousands of squeezes without wrinkling, lifting or cracking. That takes a conformable film facestock (usually polyethylene or polyolefin), an adhesive matched to the bottle resin, flexible inks and a wrap-around size calculated from the real circumference of the label panel. Get those four right and the label moves with the bottle. Get one wrong and the failure shows up on the shelf, in the shower or on the kitchen counter.
This guide is written for brand managers and procurement teams specifying labels for squeezable packaging: sauces, lotions, shampoos, cleaners and similar products. It walks from material to sizing, application and testing, so you can brief a label manufacturer with confidence.
TL;DR
- Specify a conformable film (PE or co-extruded polyolefin, often an MDO construction), not a rigid BOPP or PET facestock, for any bottle that gets squeezed.
- Match the adhesive to the bottle resin: HDPE and LDPE have lower surface energy than glass or PET, so adhesive compatibility matters more.
- Size wrap-around labels from the circumference measured at the label panel, not the diameter, and check whether the wall is tapered.
- Apply with controlled pressure, let the adhesive cure, then test by squeezing, flexing and exposing the label to the product's real conditions.
- Share bottle drawings, resin, filling method and end-use environment when you request a quote.
Table of Contents
- Why labels fail on squeeze bottles
- Choose the right facestock
- Match the adhesive to the bottle resin
- Wrap-around labels: sizing and seam
- Apply the label correctly
- Test before you commit to a full run
- Requirements by industry
- What to include in your label brief
- Our perspective
- Talk to us about your squeeze bottle labels
- FAQ
- Sources
Why labels fail on squeeze bottles
A glass bottle never changes shape. A squeeze bottle does, every time someone uses it. The label sits on a surface that dents inward and springs back, so the facestock, adhesive and ink all have to deform and recover together.
Most failures trace to a material mismatch. A stiff film resists the bending, so it creases at the first squeeze and the crease stays. The same stiffness puts constant shear on the adhesive, and the edges begin to lift. Avery Dennison's squeezable films technical guide makes the practical point that the bigger the bottle, the bigger the label and the more conformable the film needs to be.
The usual symptoms and their likely causes:
| Symptom | Likely cause | What to change |
|---|---|---|
| Wrinkles or creases after squeezing | Facestock too stiff for the wall flex | Move to a more conformable PE or PO film |
| Edges lifting | Adhesive not matched to low-energy resin, or label too stiff | Specify an adhesive tested on HDPE or LDPE; soften the film |
| Angled seam, label "climbing" | Tapered bottle wall with a long rectangular label | Resize at the actual panel, or use a shaped label |
| Ink cracking or rubbing off | Ink or coating not flexible, or no protective topcoat | Use flexible inks and a suitable overlaminate or varnish |
| Bubbles under the label | Trapped air at application, or label applied before the bottle is stable | Adjust application pressure and sequence |
Choose the right facestock
For squeezable containers, the film is the first decision. UPM Adhesive Materials describes PE film labels as the best fit for squeezable containers and flexible packaging, because they conform to squeezable bottles and tubes without cracking, lifting or losing print quality under repeated deformation.
PE and polyolefin films
These are the working choice for hand-squeezed bottles. They flex, recover and take flexographic, digital or other label print processes well. White and clear versions are common, so you can choose between an opaque label and a "no-label look" on a clear or tinted bottle.
MDO films
Machine-direction-oriented (MDO) films are stretched in one direction only, which keeps them stiff enough to dispense and apply at speed while remaining squeezable. Avery Dennison notes that its newer Global MDO construction is a thinner semi-squeeze film that, compared with BOPP, significantly reduces darts and wrinkles in high-speed converting and application. If your bottle is rigid-ish (a thick-walled bottle with light squeeze), a semi-squeeze film can be enough. If it is a thin-walled soft bottle, step up to a fully conformable film.

What about paper?
Uncoated or textured papers have a place on bottles that are handled rather than squeezed, such as a premium sauce in a stiff container where the label sits on a flat panel. Our guide to textured paper labels covers how to choose stocks that perform. For true squeeze use, especially in wet environments, a film is the safer specification.
Match the adhesive to the bottle resin
The film can be perfect and the label still fail if the adhesive does not grip the plastic. Quadrel notes that squeeze bottles generally need a flexible film facestock, a compatible adhesive and durable inks or coatings that can move with the bottle without wrinkling, cracking or delaminating. It also points out that HDPE and LDPE bottles often have lower surface energy than glass or PET, which calls for stronger adhesive compatibility.
In practice, tell your label supplier:
- The resin: HDPE, LDPE, PP or PET, and whether the bottle has a slip additive or surface treatment.
- The contents: oils, surfactants and alcohols can migrate to the surface and affect adhesion.
- The environment: refrigerated, shower, hot-fill, outdoor or kitchen use.
- The application temperature: adhesives have minimum application temperatures, and cold bottles from a cooler can behave differently.
For wet and humid use, UPM describes PE and PP films with wet-strength adhesives as the standard choice for squeezable tubes, curved bottles and high-moisture bathroom environments.
Wrap-around labels: sizing and seam
Wrap-around labels are popular on squeeze bottles because they give 360-degree branding and can carry regulatory text, directions and a barcode in one piece. They are also where sizing mistakes show up fastest.
Measure the circumference, not the diameter
A common error is sizing from diameter instead of circumference. Measure the circumference at the real label panel with C = π × diameter, taking the diameter at the height where the label will sit. For example, a bottle 66 mm across has a circumference of roughly 207.3 mm.
Then decide what the seam does:
- Overlap seam: the label is slightly longer than the circumference so the ends bond. This is the usual choice for squeeze bottles because the overlap holds the label closed as the wall flexes.
- Butt seam or small gap: the ends meet or leave a tiny gap. This looks cleaner but needs tighter tolerances and is less forgiving on a bottle that moves.
For flexible tubes, a label slightly narrower than the circumference, rounded corners and a seam placed away from the tube's factory seam are common starting points; confirm the dimensions with a trial on your own container.
Check for taper
Measure the circumference at the top and bottom of the proposed label area. If the two differ, the surface is tapered, and a long rectangular label may show an angled seam, wrinkles, edge lift or a front panel that appears to climb around the bottle. Solutions:
- Shorten the label height so it sits on the straightest part of the wall.
- Move the label to a recessed label panel if the bottle has one.
- Use a shaped label designed to the taper.
- Switch to a front-and-back pair of labels instead of one wrap.
Keep graphics away from the stress zones
Squeeze bottles flex most at the shoulder and the lower sides. Keep barcodes, small legal text and fine foil or metallic details out of the highest-flex area, and leave a margin at the top and bottom of the straight wall so the label edge does not ride onto a curve. Finishes need the same thought: our overview of packaging finishes and print effects shows what is available, and our comparison of metallic inks and foil helps you decide which metallic look suits your label.

Apply the label correctly
A well-specified label can still fail if it is applied badly. Whether you apply by machine or by hand on a pilot run, follow the same sequence:
- Start with a clean, dry bottle. Mold-release agents, dust, condensation or product residue on the surface stop the adhesive from wetting out.
- Hold the bottle in its normal shape. Label an unsqueezed, unpressurized bottle at the temperature your adhesive datasheet recommends.
- Apply the leading edge square, then wrap with steady, even pressure so no air is trapped.
- Press the overlap seam firmly so the trailing edge bonds fully to the leading edge.
- Let the adhesive build. Adhesion keeps rising after application. In one patent describing a deformable label tested on LDPE bottles, the adhesion was found to increase after an 18-hour cure, after which the label could not be removed without damage. Your own adhesive will have its own build time, so ask your supplier for it before you squeeze-test or ship.
Test before you commit to a full run
A bench test is cheap compared with a recall or a relabeling job. Build a short test plan around how the bottle will really be used:
- Squeeze cycles: squeeze filled bottles repeatedly, by hand or with a simple rig, and inspect after each batch for wrinkles, lifting and ink cracking. The patent above describes squeeze testing on a machine built to simulate hand squeezing, and a shower test where bottles were flexed several times daily over months, which shows the kind of real-use thinking worth copying.
- Moisture and temperature: run bottles through the conditions they will face, such as refrigeration, a damp bathroom or a warm warehouse.
- Rub and chemical exposure: wipe the label with the product itself, sanitizer or cleaning solution, whichever your customer will use.
- Legibility: check that barcodes still scan and small text still reads after flexing.
- Seam check: look at the overlap after cure and after squeezing; any lifting at the seam will grow.
Record the results with photos and keep the sample bottles as your reference when production arrives.
Requirements by industry
The label structure is the same family of film and adhesive, but the brief changes with the product.
- Cosmetics and personal care: lotions, serums and shampoos see water, oils and surfactants. Wet-strength adhesives and protective topcoats matter, and the label also has to look premium. See our cosmetic and beauty label printing.
- Food and sauces: consider contact with oils and cleaning routines. Check the regulations that apply in your market for labeling content and any indirect food contact, and confirm with your regulatory advisor.
- Wine, spirits and craft beverages: these are less often squeezed, but squeezable formats exist for cocktail mixers and syrups. Our wine and spirits labels page shows the premium finishes we produce.
- Pharmaceutical and health products: content, legibility and traceability are central. Serialization and authenticity features can be added through variable data labels and anti-counterfeit labels. Your regulatory team sets the required content for your market.
What to include in your label brief
A supplier can quote accurately and avoid trial-and-error when you give it:
- Bottle drawing or physical samples, including resin, wall thickness and the label panel dimensions
- Circumference at top and bottom of the label area
- Contents, fill temperature and storage conditions
- Application method (machine or hand), speed and label orientation
- Finish expectations: matte, gloss, soft-touch feel, foil or embossing
- Quantities, seasonal timing and any certifications you need, such as FSC® for paper-based elements
Our perspective
Squeeze bottle labels are a good example of why we treat a label as an engineered component and not just a printed sticker. The best ones look effortless because the film, adhesive, ink and geometry were chosen together.
At Yuan Packaging we bring more than 25 years of experience to pressure-sensitive labels and an atelier-style attention to detail. For squeezable formats, we start with the bottle: its resin, its taper, how it will be handled. Then we guide you from concept to finished product, from the film and finish options to the wrap size that sits flat. Premium effects such as foil stamping, embossing, spot UV and soft-touch lamination can sit on a flexible label when the construction is planned for it.
Our advice is simple: bring us your bottle early, and let us help you build the label around it. That is how a brand gets a label that keeps its shelf presence from the first squeeze to the last.
Anthony
Talk to us about your squeeze bottle labels
If you are planning a launch or a reorder, our team can help you choose the construction and finishes for your bottle. We make custom pressure-sensitive labels for beauty, wine and spirits, pharmaceutical, gourmet food and retail brands, with options for sustainable materials.
Send us your bottle specifications and quantities through our custom label printing page and we will take it from there. If you also need outer packaging for the same launch, you can browse our folding cartons too.
FAQ
What is the best label material for squeeze bottles?
A conformable film such as polyethylene or co-extruded polyolefin is the standard choice, because it flexes and recovers with the bottle. For lighter squeeze on stiffer bottles, a thinner MDO semi-squeeze film can work. Always confirm with a trial on your own bottle.
Why do labels wrinkle on squeeze bottles?
Usually because the facestock is too stiff for the way the bottle wall moves. A rigid film cannot bend and recover, so it creases. A tapered wall with a long rectangular label can add angled seams and wrinkles on top of that.
How do I size a wrap-around label?
Measure the circumference at the height where the label will sit, using π × diameter, then add a small overlap for the seam. Subtract a margin from the straight-wall height at the top and bottom. Check top and bottom circumference to catch any taper.
How long should I wait before testing or shipping labeled bottles?
Adhesion keeps building after application, so allow the cure time your adhesive supplier specifies before squeeze-testing or shipping. In one published example on an LDPE bottle, adhesion had increased after 18 hours to the point that the label could not be removed without damage, but your adhesive may differ.
Can premium finishes like foil or embossing be used on squeeze bottle labels?
Yes, when the label construction is planned for flex. Keep fine detail away from the highest-flex zones, and run a squeeze test on the finished sample before production.
Sources
- Squeezable Films Technical Guide, Avery Dennison
- Film label materials, UPM Adhesive Materials
- Material Science & Adhesive Engineering Questions, Quadrel
- Deformable label, US patent 4,587,158